One tip regarding attaching a car body to a chassis was so just-plain-KOOL!
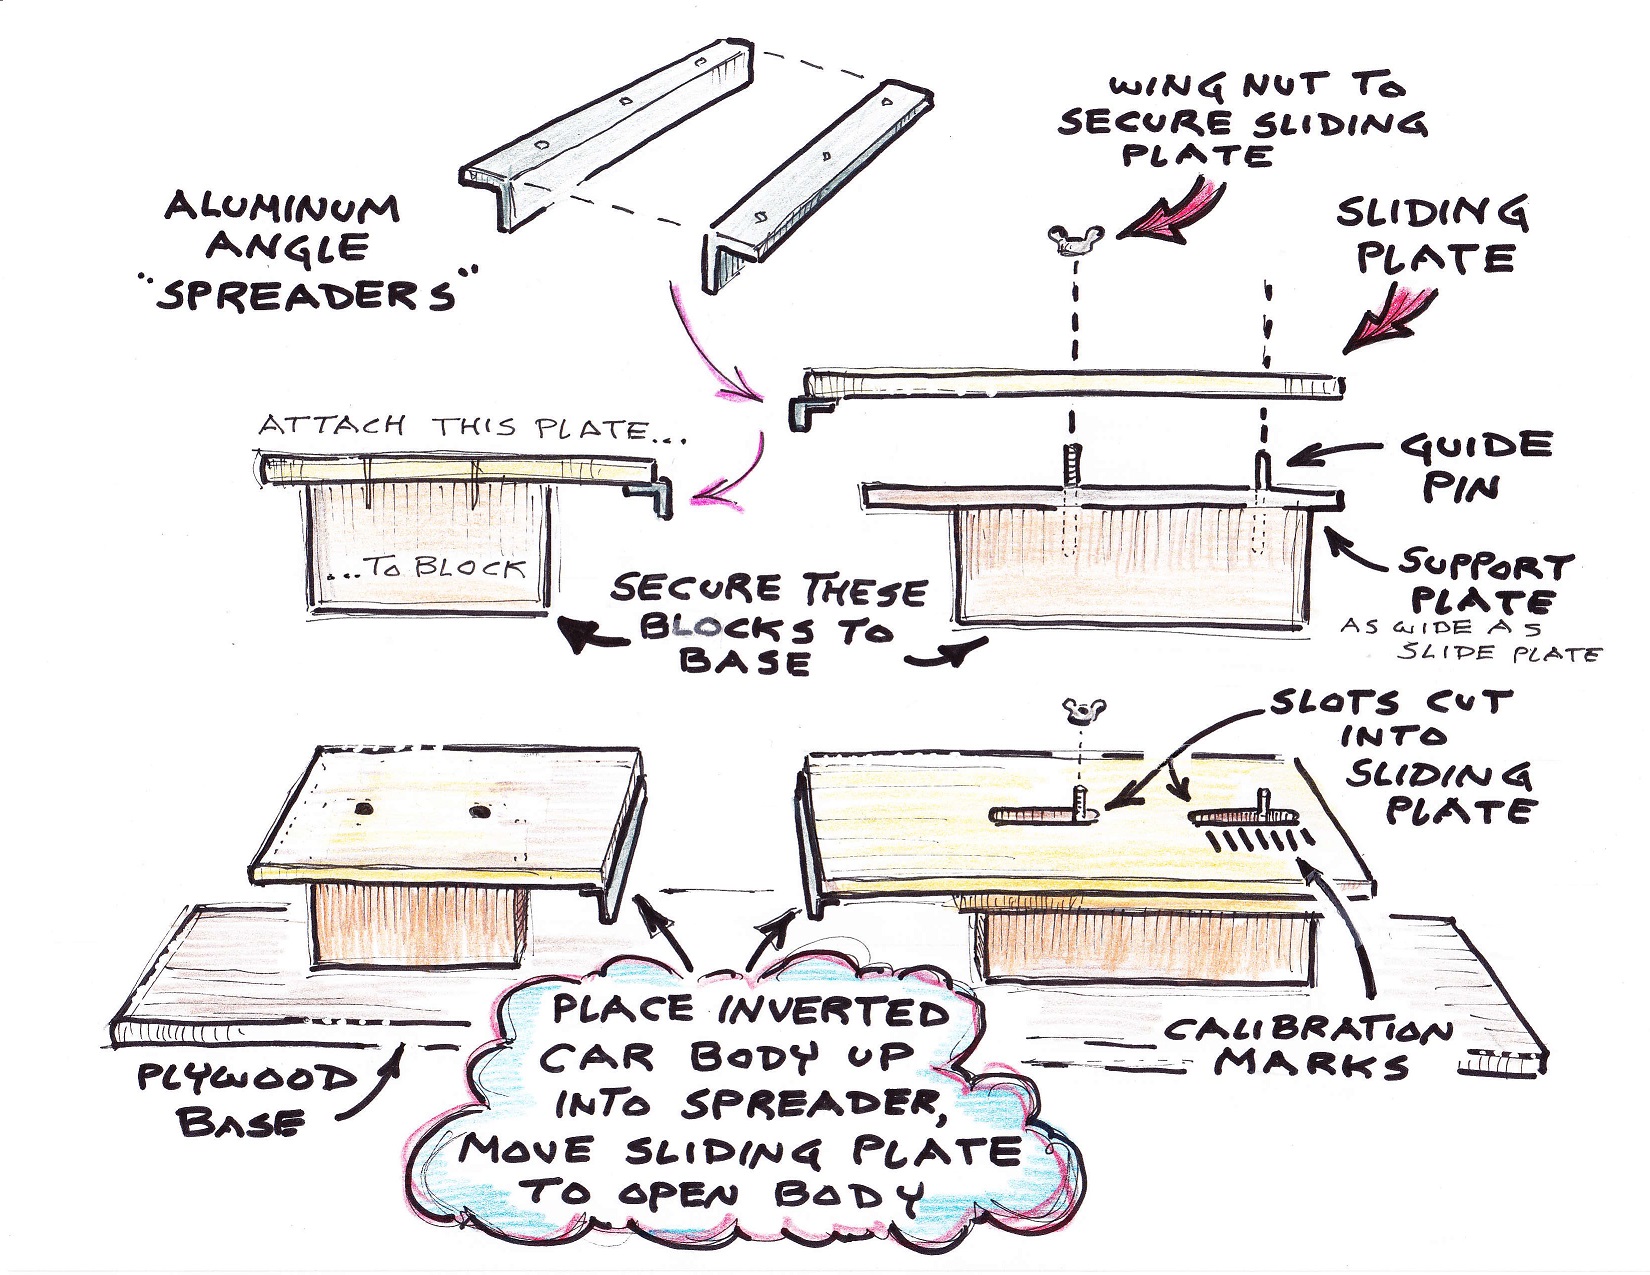
Rich Williams built an all-purpose body-spreading tool that's a real jewel. The car body is placed upside-down into the tool, where two aluminum angles can spread the body just enough to accommodate slipping in the chassis.
This tool works well to install and remove the chassis from the body. The best thing is that you have complete control over the amount of spread. The two thin aluminum angles are covered with electrical tape to prevent scratching the paint.
I built the fixture while building a short-track car, where the front glass is glued in place from the inside. The chassis was a tight fit, so extreme spreading of the body was needed, and the windshield broke loose.
With this fixture, I can watch the windshield and only spread the body just enough for the chassis to slip in place.
I added a gauge that can be marked when I determine the amount of spread for each model. The wing nut is tightened when you have the spread where you need it. The fixture is super helpful when removing the chassis, because you know from the arrow just where to spread the body.
After the model is painted, I use a soft towel resting on the plywood base to prevent damage to the paint.


Tidak ada komentar:
Posting Komentar